
What if the secret to a beautifully painted wall isn’t the paint at all? It starts with what lies underneath.
A smooth, flawless wall begins with proper wall putty work. More than just a preparatory layer, wall putty helps fill minor surface imperfections, smooth uneven areas and create a uniform base for primer and paint. The right putty, applied correctly, can make the difference between a finish that looks ordinary and one that looks professionally done.
But getting that perfect finish takes more than simply applying putty to a wall. Surface preparation, the right mixing consistency, proper application, drying time, sanding and finishing all influence the result. Using a suitable, high-quality wall putty can also help improve surface smoothness and create a better base for subsequent coats.
Whether you are preparing newly plastered walls or renovating an existing home, understanding the wall putty application process helps you get better results while avoiding common problems such as cracks, uneven surfaces, excessive material consumption and poor paint adhesion.
So, how do you apply wall putty correctly—and how do you choose the right product for your walls? In this guide, discover how to apply wall putty step by step, wall putty drying time, coverage, approximate cost and expert tips for achieving a smooth, durable and paint-ready finish.
Explore Birla White WallCare Putty for a smooth, bright and durable base for primer and paint.
Wall putty work refers to preparing and applying wall putty over a suitable plastered surface before primer and paint.
Wall putty is generally used to:
White cement-based putties can also provide additional resistance to moisture and help create a stronger surface foundation. For example, Birla White WallCare Putty is a white cement-based putty formulated with Extra HP Polymers for water resistance, bonding and a smooth finish.
Important: Wall putty is a finishing material, not a substitute for repairing major cracks, structural defects or active water leakage. Such problems should be addressed before starting putty work.
A professional-looking finish depends heavily on following the correct sequence. Here is a practical wall putty application process.
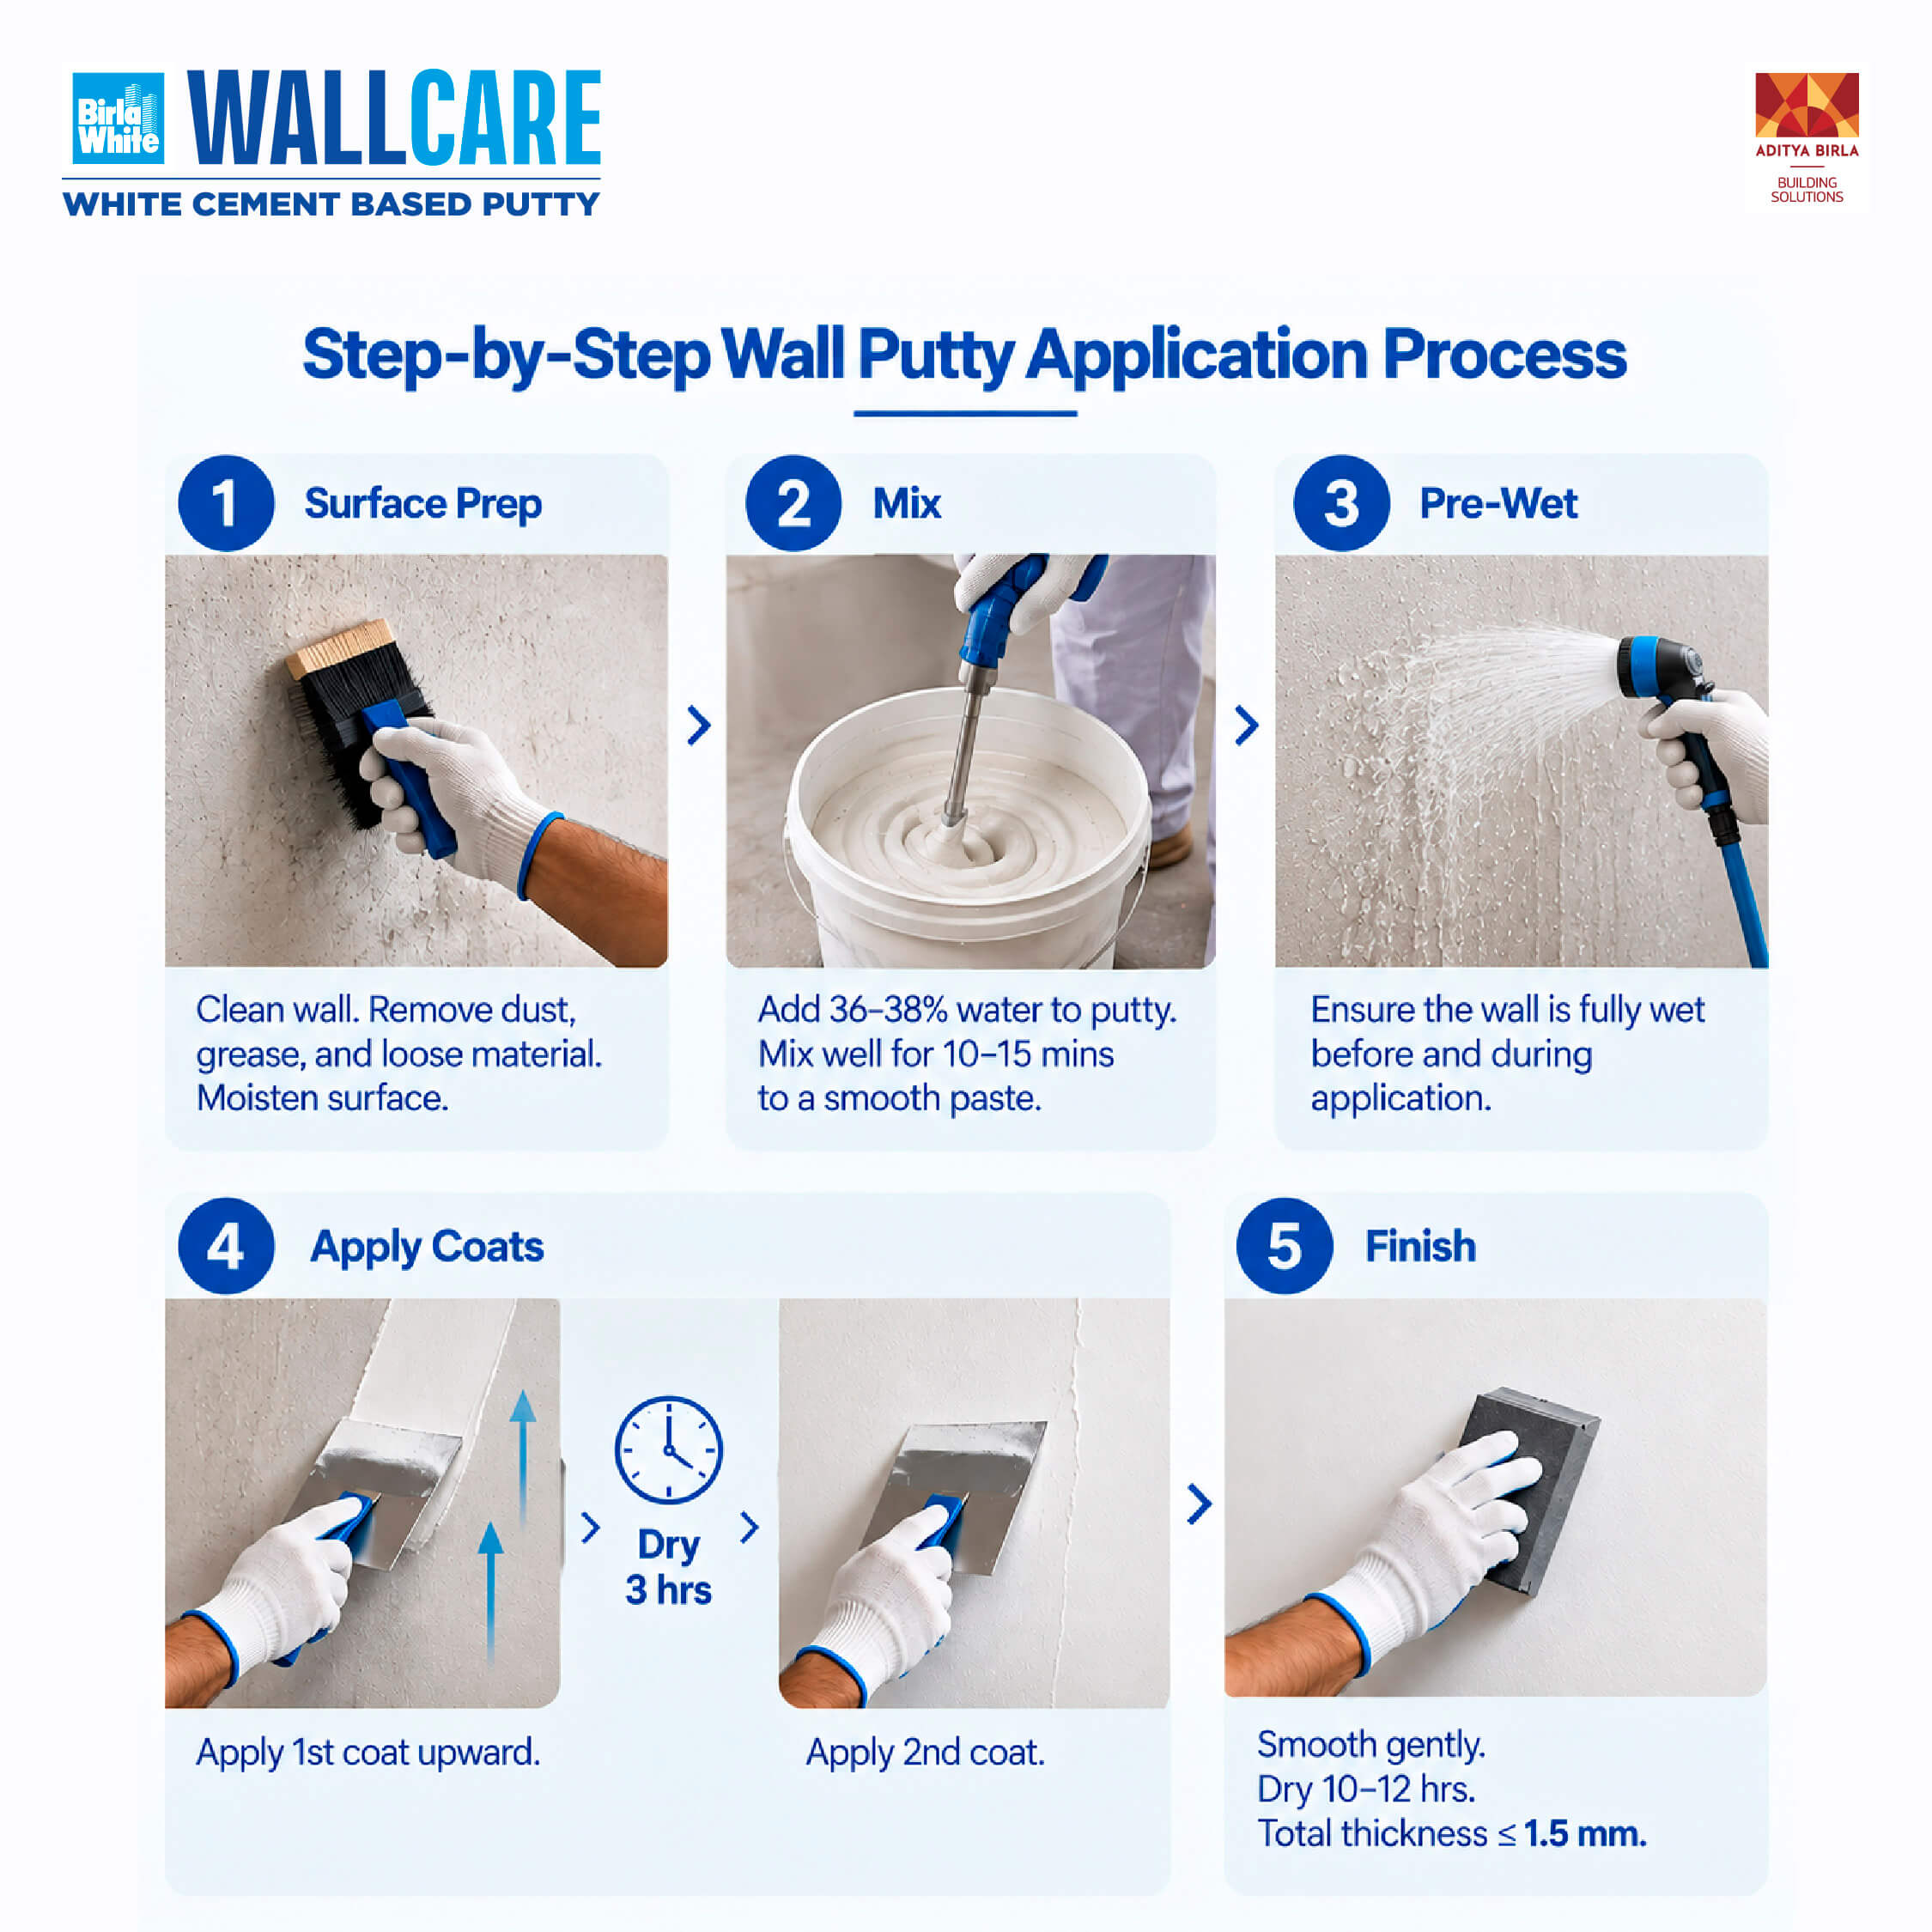
Surface preparation is the first and one of the most important stages of wall putty work.
Before applying putty:
For cement-based putty, the wall should generally be properly moistened before application. Birla White recommends pre-wetting the substrate because it can improve bonding, workability and coverage.
Pro Tip: Do not apply putty over a dusty, oily or unstable surface. Even a good-quality putty can give poor results when the underlying surface has not been prepared properly.
Correct mixing determines the consistency and workability of the putty.
For Birla White WallCare Putty, the recommended mixing requirement is approximately 36–38% clean water. Water should be added gradually to the putty while mixing rather than adding the putty to water. The mixture should be thoroughly mixed for around 10–15 minutes to achieve a smooth, uniform paste.
A mechanical mixer can help produce a more consistent, lump-free mixture.
Avoid This Mistake: Do not prepare a very large quantity of putty if it cannot be used within its recommended working time. Birla White advises preparing an amount that can generally be used within around 3–3.5 hours, depending on the product guidance.
Before applying cement-based wall putty, thoroughly wet the wall with clean water.
The surface should remain adequately moist during application but should not have standing or dripping water.
Pre-wetting helps prevent the wall from absorbing water from the putty too quickly and can improve adhesion and workability.
Once the surface is prepared and the mixture is ready, apply the first coat using a putty blade.
Spread the putty evenly across the surface using controlled, upward strokes. Maintain a thin and uniform coat instead of trying to cover major unevenness with one thick application.
The objective of the first coat is to fill minor imperfections and establish a relatively even surface.
For Birla White WallCare Putty, the recommended application direction is from bottom to top, which can help achieve uniform application and reduce wastage.
Do not rush into the second coat.
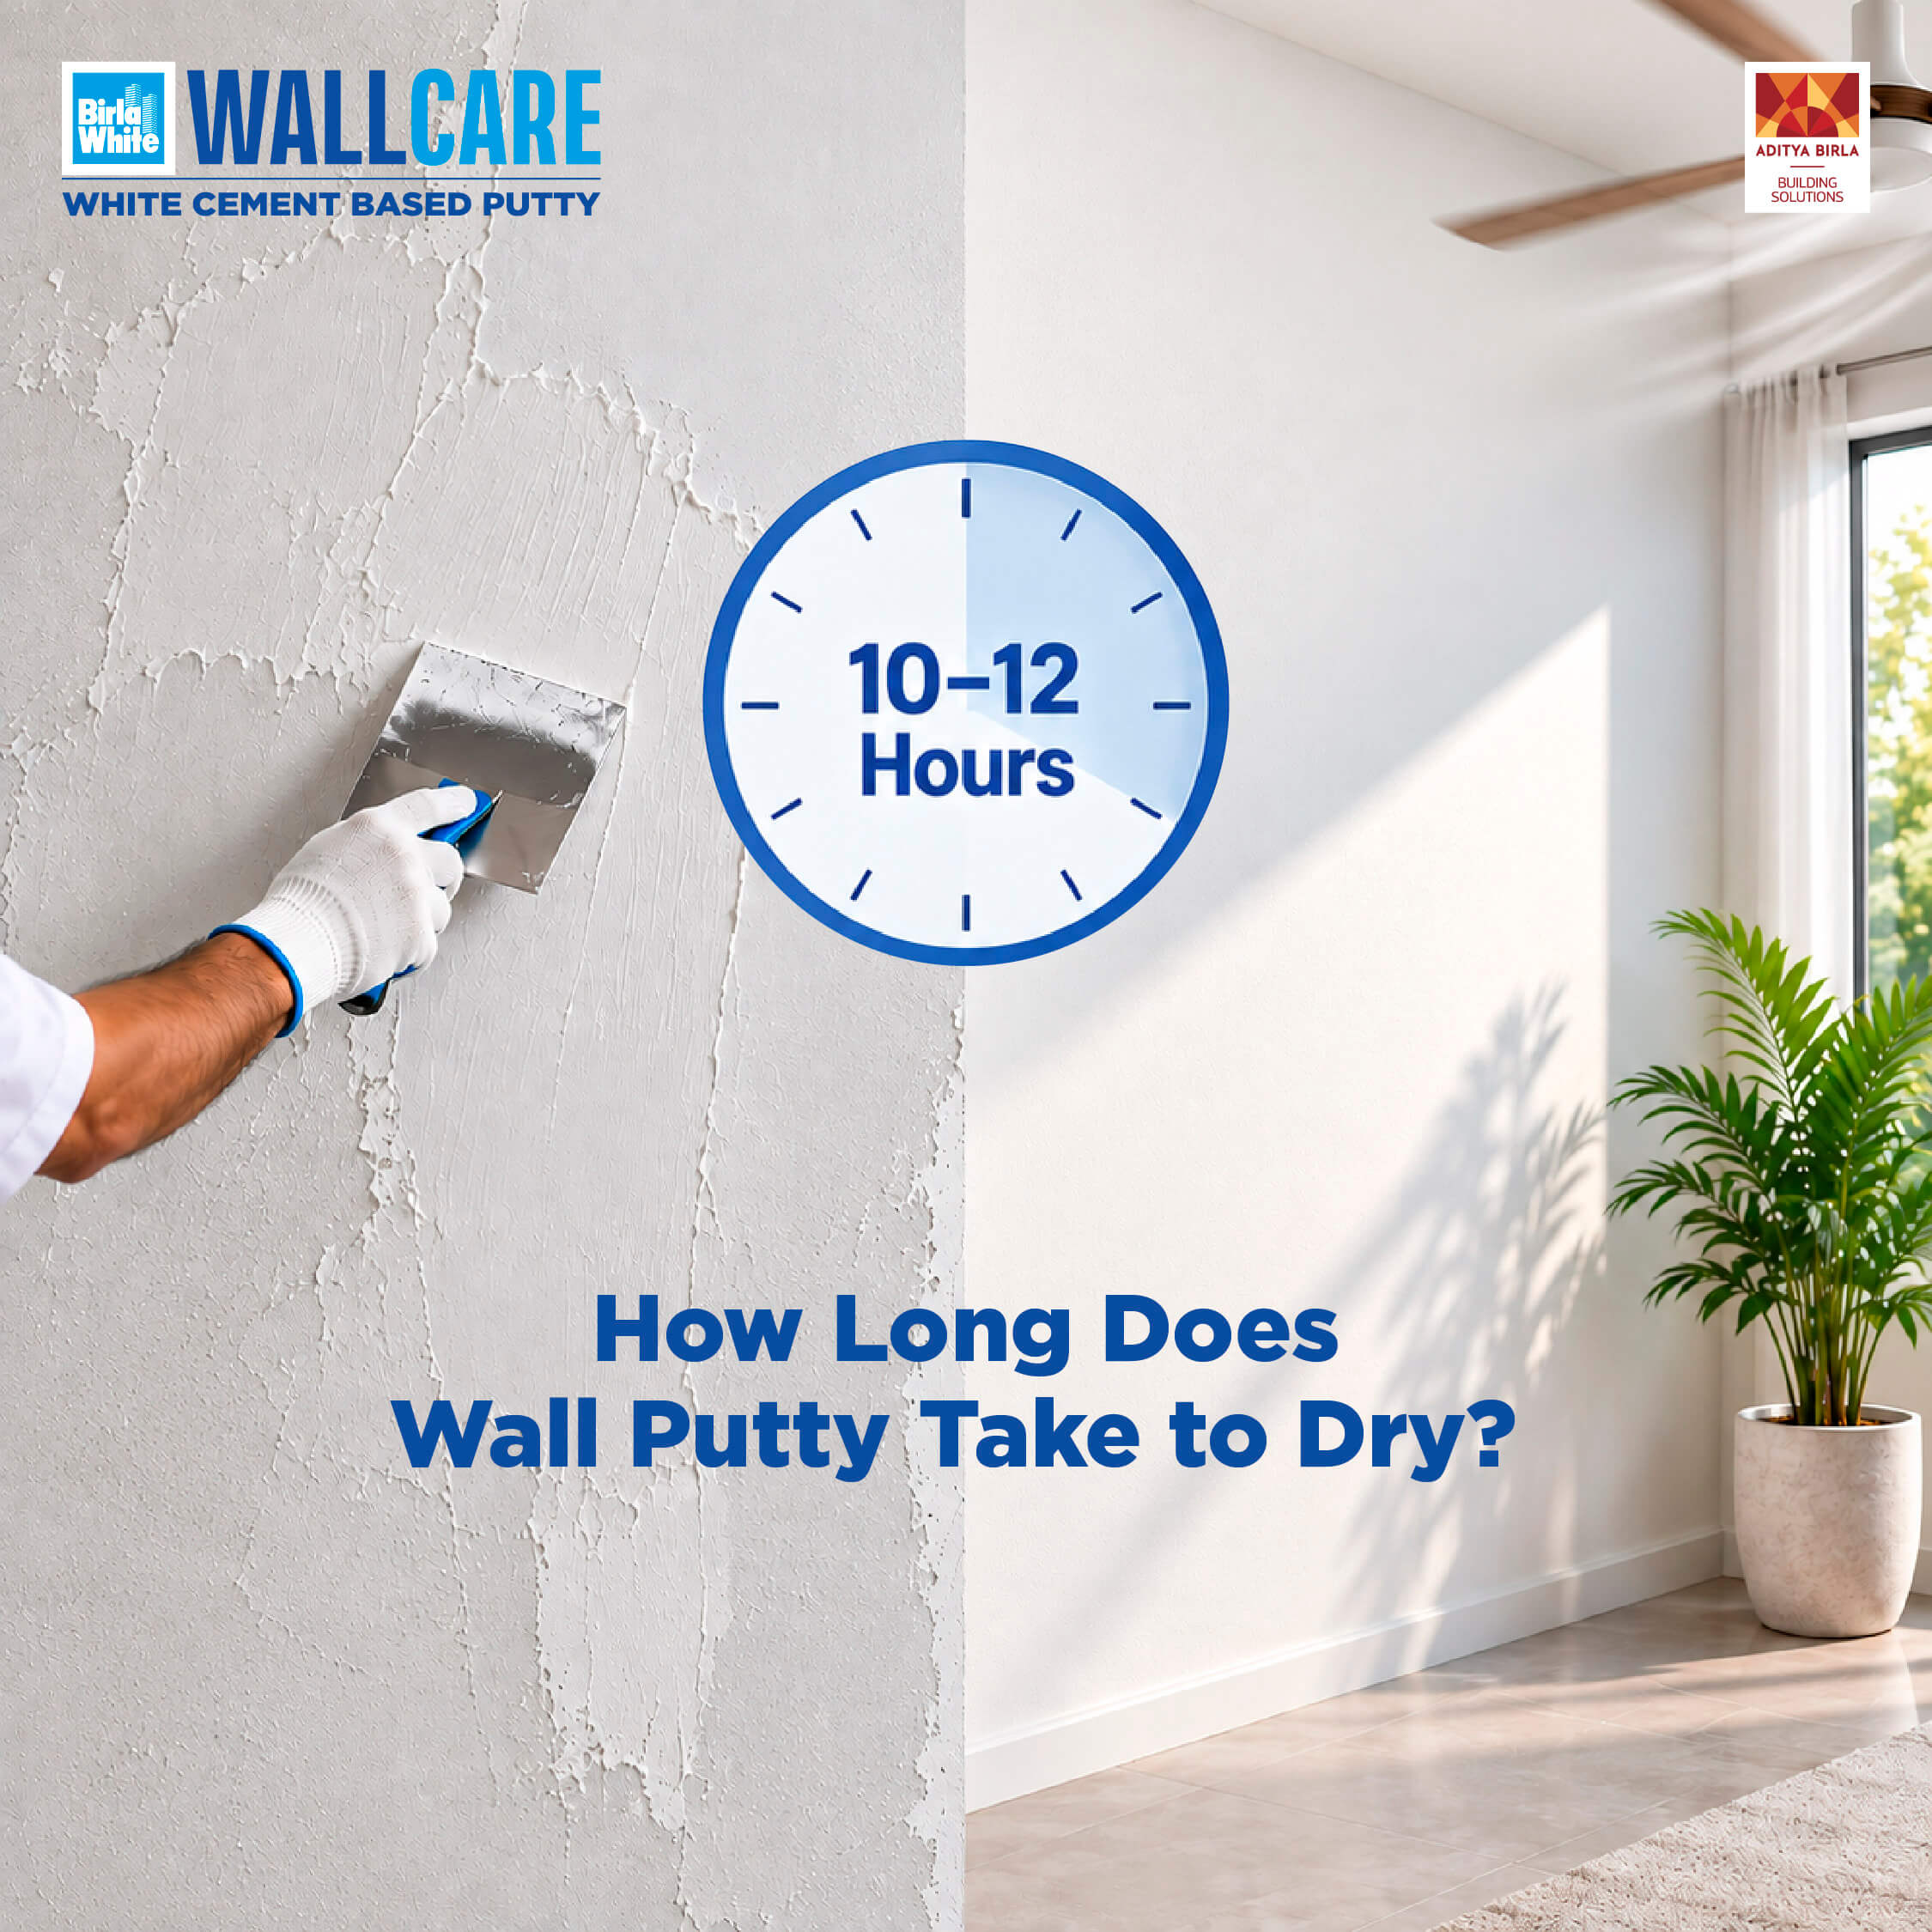
The first coat needs adequate drying time before the next stage. Birla White recommends allowing at least 3 hours before applying the second coat under its specified application process. Actual drying can vary depending on temperature, humidity, ventilation, substrate condition and application thickness.
Looking for a high-quality wall putty that delivers a smooth, bright and durable base for your paint? Birla White WallCare Putty is a white cement-based, water-resistant wall putty designed for superior whiteness, strong adhesion and a smoother finish than ordinary putty.
As a practical guide:
| Stage | Approximate Time |
|---|---|
| Between first and second coat | At least 3 hours |
| After second coat | Preferably 10–12 hours or overnight |
| Before primer or paint | Ensure the surface is completely dry |
Always follow the specific product manufacturer's instructions and prevailing site conditions. Birla White's guidance recommends overnight drying or approximately 10–12 hours after the final coat for its WallCare Putty.
After the first coat has dried, inspect the wall for minor unevenness or loose particles.
Depending on the product instructions, the surface can be gently smoothed using:
Avoid aggressive sanding. Excessive rubbing, particularly with coarse emery paper, can damage the putty film and affect its water-resistant properties.
The second coat is used to further refine the surface and achieve a smoother, more uniform finish.
Apply it evenly using the same controlled technique. The second coat should not be unnecessarily thick.
For Birla White WallCare Putty, the total thickness of the applied coats should be kept within the manufacturer's specified limit. Its technical guidance specifies a maximum total thickness of 1.5 mm for the relevant application system.
This is another stage where patience matters.
Allow the final coat to dry thoroughly before sanding, priming or painting. Birla White recommends leaving the final WallCare Putty application to dry preferably overnight or around 10–12 hours.
Humidity, temperature and ventilation can influence the actual drying time.
Once the second coat is completely dry, inspect the wall under adequate lighting.
If required, gently smooth minor irregularities using suitable fine waterproof emery paper. Remove sanding dust before proceeding.
The objective is a smooth, even and paint-ready surface, rather than aggressively sanding away the putty layer.
After the wall putty has dried completely and the surface has been finished, proceed with the appropriate primer and then the selected topcoat.
A typical wall-finishing sequence is:
Plastered wall → Surface preparation → Wall putty → Drying → Light finishing or sanding → Primer → Paint
Primer helps prepare and seal the surface for the subsequent paint system, while putty primarily focuses on smoothing and refining the substrate.
Wall putty does not always dry at exactly the same speed. Several factors can affect drying.
Higher humidity can slow moisture evaporation and extend drying time.
Cooler conditions can increase drying time, while suitable warm conditions may accelerate it.
A thicker application generally requires more time to dry properly.
Good air circulation can support more consistent drying.
Highly absorbent or uneven substrates can affect how the putty behaves and dries.
Different cement-based and acrylic putties have different recommended drying and recoating times. Therefore, always check the product-specific technical guidance.
The total wall putty cost depends on several factors, including the type of putty, brand, wall condition, number of coats, coverage, labour rates and location.
As an indicative 2026 market range, wall putty labour alone can vary around ₹8–₹15 per sq. ft. for basic work and approximately ₹15–₹25 per sq. ft. for premium finishing, depending on location and scope. Material costs vary considerably by product and pack size.
| Cost Factor | Why It Matters |
|---|---|
| Putty type | Different formulations have different prices |
| Brand | Premium formulations may cost more |
| Number of coats | More coats increase material and labour requirements |
| Wall condition | Damaged surfaces require additional preparation |
| Surface area | Larger projects may have different labour rates |
| Location | Labour and material rates vary by city |
| Finish requirement | Premium finishes may require additional preparation |
| Coverage | Higher coverage can reduce material consumption and costs |
Tip: When comparing quotations, don't look only at the price per sq. ft. Check whether the quote includes surface preparation, number of coats, sanding, material, labour, primer and painting.
Putty requirement depends on the wall's surface condition, number of coats and the manufacturer's stated coverage.
For example, Birla White states that 1 kg of WallCare Putty can cover approximately 17–20 sq. ft., depending on the substrate and application conditions. Its product brochure gives a two-coat coverage range of approximately 1.5–2.0 sq. m/kg on a smooth, normal mortar wall.
Putty required = Total wall area ÷ Coverage per kg
For example, if your wall area is 1,000 sq. ft. and the assumed coverage is 20 sq. ft. per kg:
1,000 ÷ 20 = approximately 50 kg
Actual consumption can be higher or lower depending on wall texture, unevenness, application thickness and wastage.
Dust, grease, loose plaster and flaking paint can compromise adhesion. Always prepare the substrate before application.
Avoid adding water randomly. The correct water-to-putty ratio helps achieve the intended consistency and performance.
Applying one excessively thick layer to hide major wall defects can lead to uneven drying and finishing problems.
Do not apply the second coat or paint simply because the surface appears dry. Follow the recommended drying and recoating time.
Aggressive sanding can damage the putty layer. Use appropriate fine or waterproof emery paper gently where required.
Clean water helps maintain the desired consistency and reduces the risk of contamination.
For interior and exterior applications, choose a product specifically suited to the substrate and environmental conditions. For example, Birla White WallCare Putty is a white cement-based, water-resistant putty intended for wall-finishing applications.
Even good-quality putty can underperform when the application process is incorrect.
Dust can interfere with adhesion and result in poor finishing.
For cement-based systems such as Birla White WallCare Putty, appropriate pre-wetting is an important part of the recommended process.
An overly diluted mixture can affect application consistency and performance.
Trying to correct major undulations using excessive putty can result in an inconsistent finish.
Applying another coat too early can compromise the finish.
Harsh sanding can damage the putty surface and its protective properties.
Moisture trapped beneath primer or paint can contribute to finishing problems. Always ensure the surface is adequately dry before proceeding.
Small repairs and simple surfaces may be manageable for an experienced DIY homeowner. However, complete wall putty work across a house requires consistency in:
For large areas or new construction, professional application is generally preferable because poor application can become visible once the final paint is applied.
Good wall putty work is about more than creating a white surface before painting. It establishes the foundation for a smooth, uniform and visually appealing wall finish.
From properly preparing and pre-wetting the surface to mixing the putty correctly, applying thin coats and allowing sufficient drying time, every stage matters.
Choosing a suitable white cement-based putty such as Birla White WallCare Putty, along with following the manufacturer's application instructions, can help create a stronger and smoother base for the subsequent primer and paint system.
The key takeaway: Don't rush the wall putty process. Proper preparation + correct mixing + even application + adequate drying + gentle finishing = a better paint-ready surface.
Two coats are commonly used to achieve a smooth and uniform surface, although the exact requirement depends on the wall condition and product instructions. Birla White WallCare Putty application guidance recommends two coats.
The final coat should be allowed to dry completely before primer or paint is applied. For Birla White WallCare Putty, the recommended drying period after the final coat is preferably 10–12 hours or overnight, depending on conditions.
Wall putty should be applied only after the substrate has been appropriately prepared. The wall must be sound and free from dust, grease, loose material and other contaminants. Cement-based putty may also require pre-wetting as specified by the manufacturer.
Wall putty is not mandatory for every paint system or surface, but it can significantly improve surface smoothness and uniformity, particularly on plastered walls with minor imperfections.
Wall putty can help fill minor surface imperfections, but significant or structural cracks should be properly assessed and repaired with an appropriate repair material before putty application.
There is no single fixed rate because material and labour costs vary by product, location, wall condition and number of coats. As an indicative 2026 reference, basic wall-putty labour may range around ₹8–₹15 per sq. ft., while premium finishing labour can be higher.
Light finishing may be required to remove minor irregularities. However, aggressive sanding should be avoided, particularly with cement-based water-resistant putties, because excessive rubbing can affect the surface film.
The usual sequence is wall putty, drying, finishing or sanding, primer and paint, subject to the specific paint and putty manufacturer's recommended system.
Fill out this form to talk to our experts.
Our team typically replies in 24 hours.


